Big This Week

Recent Posts

Saturday, 31 October 2015

'It's a witch!'- Last Minute Halloween Make-up Tutorial

Hi Everyone,

I've got look number two coming your way now- a green witch make-up tutorial modelled by this stunner, Amy...


STEP ONE


Prepare your skin by removing any make-up and oils, I would suggest using a micellar water for this. Any oils will interfere with the face paint. Also, put on the outfit you will be wearing as the paint is going to come down the body (the areas that are on display)and move the hair out of your face!

STEP TWO


Simply apply the green face paint, this one is from Snazaroo, all of the face, neck and chest (and anywhere else that will be on display). You will need to do a couple of layers to build the colour intensity, but make sure the layer underneath is dry first. 


STEP THREE


Just like with normal foundation, contour and highlight, target these areas in the same way but replace them with green shades. So, use a darker green face paint on the hollows of the cheeks, temples and jaw line and blend (this is quite difficult because the paint is water based and smudges- perhaps use oil based make-up if you can as the consistency is easier to blend). And then mix a little bit of green and white paint together and apply it under the eyes in a triangle shape, down the middle of the nose and in the centre of the forehead. You can build either as much as you desire, I wanted a strong contour so it does stand out quite a lot. 


STEP FOUR


Then use the same colours, add some detailing to the neck bone structure to make it appear more skeletal- putting a lighter shade on the tops of the bones and defining them with darker shades. Blend this out also.

STEP FIVE


Now for the eyes! Start off by mapping out the initial shape you want to go for on the eyes, I did this with a dark green eye crayon from Barry M. This will act as a base for the eyeshadows and help the longevity of the eye make-up.

STEP SIX


With a medium-dark green eyeshadow shade, apply this all over the lid. Then, with a black eyeshadow, pat this onto the outer corner of the eye and in the crease and wing it out a little. Then with a fluffy blending brush... blend, blend, blend! It isn't overly crucial to blend as this is Halloween, you can get away with more striking make-up- that's my excuse anyway! 

STEP SEVEN


Bring the black and green under the eye too and blend them together. 

STEP EIGHT


Grab a preferably waterproof black, kohl eyeliner end put it in the water line and upper lash line. With a black, liquid eyeliner felt tip (whatever you find easiest), line the upper lash line and create a flick. Pop on some false eyelashes and mascara. 


STEP NINE


Using a small paint brush fill in any little, skin coloured areas with the green face paint. This will usually be around the mouth, nose and eyes. Once you've done that, grab a vampy lipstick- this is Dark Side-MAC and apply it to the lips. Then, with a damp brush, get some black eyeshadow and put it on the outer corners of the mouth and blend across to make a gradient. 

All make-up done! Now, get your cape and witch's hat a pose for those photos!


That is all the Halloween posts you'll be getting from me this year, unfortunately. I hope you have an amazing Halloween and take lots of photos with your friends and soak up the craziness! 

Thanks for reading!

Love from
Isabel x


Here are some make-up related links to my 'Halloween Series' from last year:

Cracked Doll Face:

Scary Cheshire Cat:

Zombie:

Skeleton:

Vampire:


Share:

Thursday, 29 October 2015

Halloween Series- Creepy Clown


Hi Everyone,

It is finally that time of year again where I can bring out the face paint! Halloween is looming and I have a couple of make-up looks to hopefully inspire your costume decisions! I have decided this year that I wanted the looks to be more accessible. 

Here is look number one, a creepy clown, modelled by my gorgeous friend Remy...


STEP ONE


Start with a clean face and remove any oil from the skin so the paint stays on better later on. Simply do a normal skin base using, foundation, concealer and powder. Then contour your cheeks more than you would usually to give the effect of rounder cheeks (like a clown). The easiest method of this, personally, is by sucking your cheeks in like a fish! 

STEP TWO


Using a bright coloured eye shadow (I chose pink), apply this with a damp eyeshadow brush on the the inner-mid part of your eyelid. (Dampening the brush will increase the pigmentation and intensity of the colour). 

STEP THREE


Pat some black eyeshadow onto the outer corner or the eye and eyelid crease (feel free to wing this out as much as you want but I wanted to keep the eyes looking as round as possible). And with a fluffy blending brush, blend these colours together. Don't worry too much as this look isn't supposed to be refined, it's Halloween! 

STEP FOUR


With a felt tip liner (or any black, liquid liner you have), create an extended flick running across the lash line.

STEP FIVE


Bring this liner underneath the eye too and down past the tear duct. 


STEP SIX


Now for the clown-esque detailing. Put a tiny dot above each eyebrow as to where you want the triangle points to be. Then draw a triangle and fill it in. I kept adjusting it, so just go with it really!


STEP SEVEN


Apply, quite a dramatically, a different colour eyeshadow under the eyes. I blended a couple together but I wanted the lines to stand out also.

STEP EIGHT


Then, once again using your trusty eyeliner draw a smaller triangle underneath the eye. I also added some glittery, blue dots onto each point and popped on some mascara.

STEP NINE


Map out the mouth using the eyeliner and either fill in the lips with a black lipstick (which I couldn't find) or black face paint. With a very thin painting brush create lines either side of the mouth and an enhanced cupid's bow- I went for triangular to keep with the theme but I think a heart shape would look good too. And then draw on a nose.

STEP TEN


Once that has dried, get a small amount of white face paint and put a little dot on the nose and mouth to make the look more animated. 

STEP ELEVEN


It's collar time! Using a wide-ish brush (I used a Real Techniques Foundation Brush) to make stripes down the neck and onto the chest. 

STEP TWELVE


As you can see, I changed the shape at the end of the stripes, so just play around with them really.

STEP THIRTEEN


Using a black liner or face paint, outline the collar and make it look more cartoon like. I did add some black eyeshadow here and there to make it all stand out more against Remy's skin. 

ALL DONE! 

Here are some posed shots for yah!


Thanks for reading!

Here are some make-up related links to my 'Halloween Series' from last year:

Cracked Doll Face:

Scary Cheshire Cat:

Zombie:

Skeleton:

Vampire:


Love from
Isabel x


Share:

Tuesday, 28 October 2014

Halloween Series: Half Pin-Up, Half Skeleton Make-up!

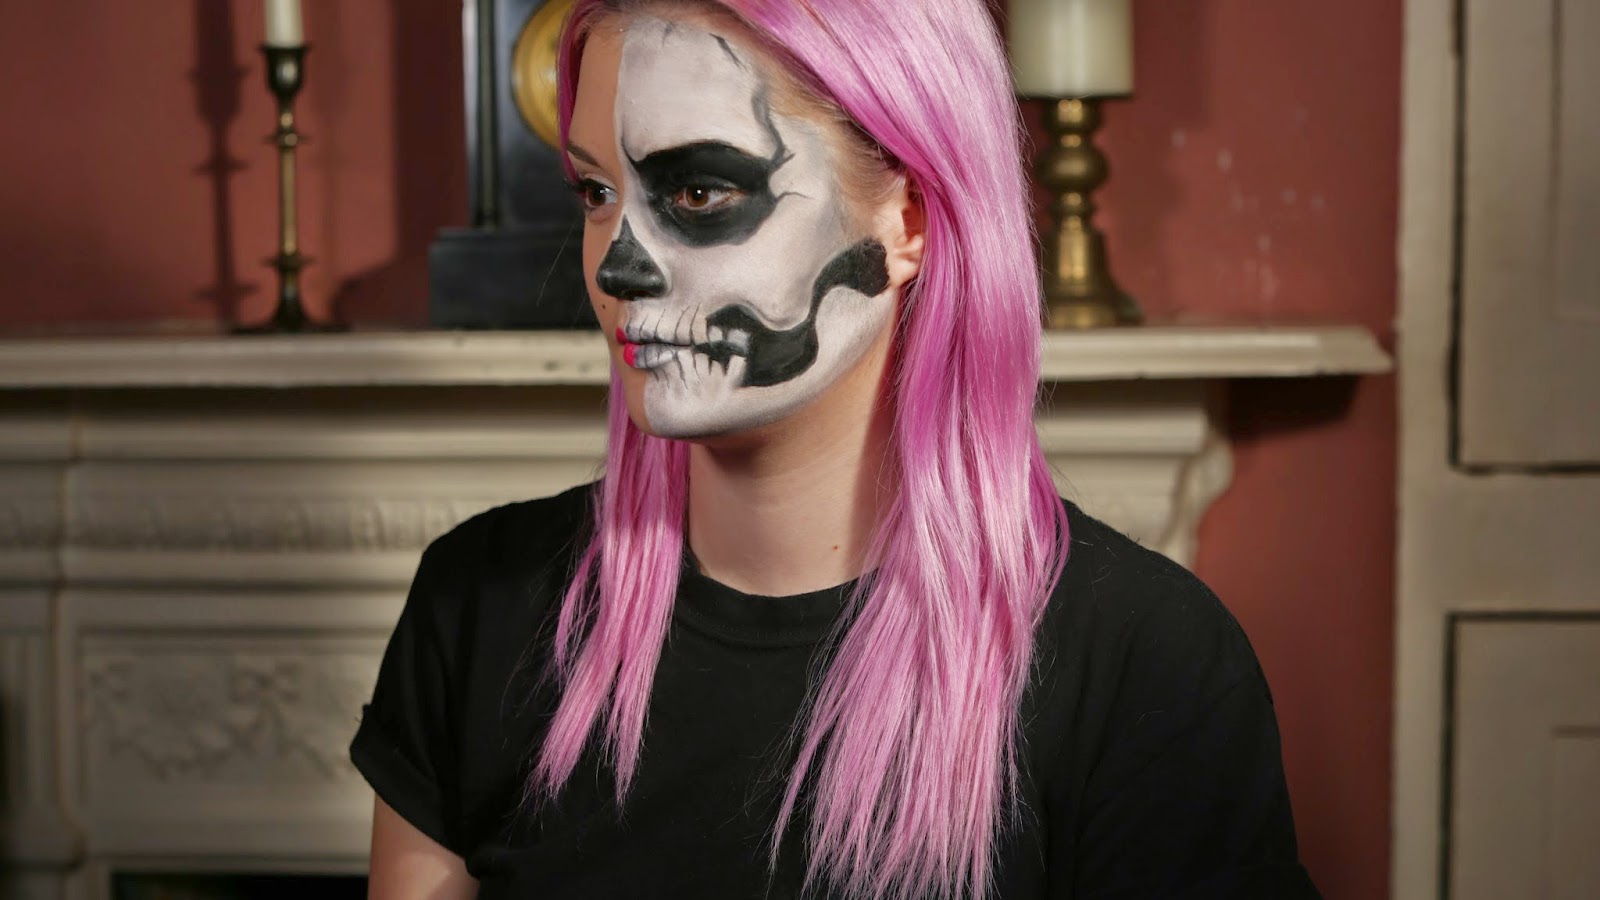
I wasn't originally going to do this make-up look, but one of my closest friends (who is at uni so I can't actually guide her in person) asked me to help her out as she wants to dress up as a skeleton this year. I documented the process and was just going to send the images to her but I have actually surprised myself as to how well it went, so I thought I would share it with you guys too! I did some research on Google and YouTube to gather some inspiration and then asked my rather gorgeous friend, Alex, to model this look for me... 


Keep reading to find out how I did it!

STEP ONE


Alex arrived at my house wearing some very natural looking make-up so I decided to take advantage and not 'start from scratch' as it were, considering half of the face in this look is supposed to be 'pretty'. She was just wearing Rimmel: Lasting Finish, 25 Hour foundation (100 Ivory), Collection: Lasting Perfection concealer (Fair, 1), some Rimmel: Clear Complexion powder and a light pink blush (which I added to later on) and Rimmel: Scandal Eyes Volume Lash mascara. But if you are doing this from scratch just add a simple base, you don't want to detract from the skeleton!

STEP TWO


I used a white eyeliner pencil by Barry M to sketch out the design, firstly sectioning the face half way and then drawing around the areas that would be black.

STEP THREE


Once all of the outlines were drawn, I filled in the gaps using a white face paint by Snazaroo. I applied a few layers of paint, allowing each layer to dry in-between, to create a greater coverage.

STEP FOUR


I then picked up my Collection 24 Hour Felt-tip Liner and carefully filled in the 'bone structure'. I originally applied black face paint but I found it too fiddly so switched to the eyeliner pen, but if you're confident enough then the face paint would probably last longer on the skin. 
I started to apply some shading and then realised I hadn't filled the nose in!

STEP FIVE 


I then filled the nose in, it sounds gross, but make sure that the nostril is covered as well!

STEP SIX


Then it was time for some shading! I just used my MUA: Winter Forest palette and dipped my brush into the grey tones, so, 'Dove Grey' and 'Slate'. I applied these shades to the outer most areas of the face and along the jaw line to add more definition. I then wanted to emphasise the shapes I had made previously so added some shading there too, with lots of blending!

STEP SEVEN


I left the teeth till last because... well... I was dreading doing them! I picked up a tiny weeny paint brush, dipped it into some water and then into my 'Blackout' (matte black) eyeshadow from my Urban Decay: Naked 2 palette (you could use black face paint but because I was scared I thought I would be able to remove the eyeshadow a lot easier than paint if I needed to!) I firstly darkened the centre of the lips so they appeared thinner and then made tiny brush strokes upwards and downwards and then rounding the edges...to make them look like teeth. I would advise having a visual aid to copy from. I got rather annoyed and stressed out at this point but I believe it all came together nicely! 

STEP EIGHT


I then went back in with the grey tones. I applied a small amount underneath each tooth, and blended the grey into the previous application. I also added a bright pink lipstick onto the 'pretty' side of Alex's face. This not only made the 'Pin-Up' look more complete but it created a vast contrast to the mono-chrome look on the other side (it also went with Alex's hair!)

STEP NINE


 I then added a small beauty spot and some winged eyeliner onto Alex's lash line. The prettiness contrasted well with the quite horrible looking skeleton!

FINISHED!

You could do a complete skeleton face, just by mirroring the look onto the other side... this means that it is also more wearable for guys too!

Here are some more photos...


I hope this has helped!

Speak soon!
Isabel x


Share:
© isabel's insight | All rights reserved.
Blogger Template Developed by pipdig