Thursday, 18 December 2014

Mini Yorkshire Pudding- Christmas Canapés!

I know my blog is mainly dedicated to beauty but I am also a food lover and loooove cooking and just creating in general. I absolutely LOVE Yorkshire puddings! I always make them from scratch, but these are usually massive. After chatting to my Mum about what we are going to do for food this Christmas I have been put on to  canapé duty. I have made the mini Yorkshire puddings once before because we had some batter left over from a roast, but they weren't overly Christmasy. So, after thinking very hard *cough* I came up with these classic combinations- Beef and horseradish and turkey and cranberry sauce! I can't even describe how yummy these are and how easy they are to make. You can make massive batches of them too! Anyway, enough blabbering... here they are!! 


(How cute!)


YOU WILL NEED

Ingredients
2 eggs
Plain flour
Milk
Sliced turkey
Sliced beef
Cranberry sauce
Horseradish sauce
Sunflower oil

Equipment
Whisk
Mixing bowl
Jug
2 glasses (same size)
Tin to cook the Yorkshire puddings in


PREHEAT YOUR OVEN TO 180 DEGREES CELSIUS 

STEP ONE


Crack both eggs into one glass.

STEP TWO


Add the plain flour to the other glass until it reaches the same height as  the eggs.

STEP THREE


Tip the flour into the mixing bowl to free up the glass. Fill the glass with milk until it is, once again, at the same height as the eggs. Basically, you want equal quantities of all of the batter
  ingredients.


STEP FOUR


Pour the eggs and milk into the mixing bowl.

STEP FIVE


Whisk all of the ingredients together, getting as much air into the batter as possible.

STEP SIX


Transfer the batter into a jug, this will just make it easier to pour later on but you could just use a ladle. 

STEP SEVEN


Pour a drop of sunflower oil into each section of the tin. Then put this into the preheated oven, the oil needs to get pretty hot before you add the batter.

STEP EIGHT


Meanwhile, tear up the meat into smaller pieces that will fit into the mini Yorkshire puddings. This is so you don't get bored waiting for the oil, you could do this step later.

STEP NINE


Take the tin out over the oven. As quickly (and as carefully) as you can, pour the batter into each section, about 2/3 full. Put them into the oven for about 10 minutes or until golden brown. Keep an eye on them, but try not to open the oven door!

Once they are cooked, they should look a little something like this... (I really want to make some more now and just gobble them up as they are!)


STEP TEN


Leave them to cool slightly or fully and then add the meat!

STEP ELEVEN


Dollop on the sauce of your choice, the beef and horseradish are my favourite but I wanted to inject a bit of Christmas with the classic turkey and cranberry sauce! Of course, you could just eat them as they are without filling them, they are equally as delicious in my opinion... or maybe I just have a Yorkshire pudding obsession (it seems to be heading that way!)


Hope you enjoy!

Speak soon!
Isabel x


Share:

Tuesday, 16 December 2014

Sparkly Purple Party Make-up!

I love this time of year as it gives me an excuse to wear sparkles! I wanted to create an affordable, simple make-up look that can be worn to a Christmas or New Years celebration. Like I said, I love a bit of sparkle, so this look has multiple glittery products, but of course feel free to calm it down...but really, when else can you go a  bit crazy with make-up if it isn't now! You may recognise my beautiful friend Alex, she modelled one of my Halloween make-up looks! I specifically chose her for this look as her hair is purple and compliments all of the purple shades I have included on the eyes. So, if you would like to achieve this look or even just get some inspiration...keep reading! 


Alex arrived at my house with her base make-up already applied so I could just crack on with the eye make-up as of course this is the focus. However, if you recreate this make-up look I would advise doing the eye make-up first as the products do tend to fall beneath the eye, therefore on to your face. Oh my... that glitter does not budge easily! In some of the latter pictures you will see some of the eyeshadow just under the eye but we just wiped it away and reapplied concealer. Anyway, let's jump right in!


STEP ONE


I firstly applied shade 2 from the Revlon 583, Exotic palette. This a light purple shade. I popped several layers of this all over the eye lid and slightly above the crease to build up the colour intensity. In the inner corner of the eye I added a light, shimmery champagne eyeshadow to open up the eye more and to add contrast to the smokey tones that appear later on. 

STEP TWO


I then darkened this slightly with a mushroomy coloured eyeshadow, I applied this into the crease to add definition and then blended. 

STEP THREE


I wanted the overall make-up look to have a winged effect so I applied Rimmel: Scandaleyes eyeshadow stick, 006, Paranoid Purple (which is just a dark, shimmery purple) as a guideline. I popped this mainly on the outer corner (still trying to keep the inner corner as light as possible) on both the upper and lower lash line, and smudged it a little.

STEP FOUR


This is where the smokiness really began! I applied a black eyeshadow ('Blackout' from the Urban Decay Naked 2 Palette) onto the outer corner, making sure that the wing was still defined and a gradient was obvious from light to dark. I also popped this into the crease, once again for definition. I then blended and blended and blended. Blending softens the colour so I kept reapplying the black until I was happy with the darkness.

STEP FIVE


I brought the darker shades onto the lower lash line as well to make it all that little bit more dramatic. GLITTER TIIIME! Using a damp eyeshadow brush, I dipped the flat side into a black and purple glitter pigment by Barry M (No.23), and patted it all over the eye lid. I did several layers for intensity. I then reapplied the light champagne shade into the inner corner as it was beginning to look a bit dull and popped some onto the brow bone as well. 
Also on the glitter front I grabbed the bright purple Glam Crystals shade from Collection and lined the upper lash line. You could use a normal black eye liner but as the title suggests, 'Sparkly Purple' is the aim!

STEP SIX


Add some lashes... I mean you're going to a party! I just used some massive, voluminous ones, but use whatever you feel comfortable in!

We then tidied up all of the fallout from beneath the eye and added a bit more of a contour to the cheek bones. I wanted the eyes to do all of the talking so we chose a light pinky/peach lipstick to tie everything all together without detracting from the eyes! 


FINISHED
Here are some posed shots!


Hope this has helped!

Speak soon!
Isabel x


Share:

Wednesday, 10 December 2014

Hazelnut and Cinnamon Hot Chocolate

CALLING ALL YOU CHOCOLATE LOVERS!

It's that time of year where you just want to snuggle up on the sofa with a blanket, film and hot chocolate... so here is something a little bit different. This is definitely a treat but is so worth the calories! Here is a recipe for a hazelnut and cinnamon hot chocolate... it has been tried and tested by a few of my friends and they LOVED it! So, if you're interested... carry on reading (its easy!)


YOU WILL NEED
Ingredients:
Chocolate and hazelnut spread 
Cinnamon
Milk
Whipped cream (optional)
Cocoa powder (optional)

Equipment:
Mug
Saucepan 
Spoon


STEP ONE


Pour the milk into your chosen mug (just for measuring purposes) and then transfer this into a saucepan. Heat the milk on a medium setting, just enough that the chocolate will melt into it later on.

STEP TWO


Once the milk has heated up a little bit, add a spoonful (or two... ) of chocolate hazelnut spread. If making a big batch I would just add a spoonful per person (this is a dessert spoon). Keep stirring the mixture so the chocolate is dispersed throughout. 


STEP THREE


Then add a pinch of cinnamon to the chocolatey yumminess!
This is just to make it a bit more Christmassy... 

STEP FOUR


Once everything is mixed together and heated, pour the hot chocolate back into your mug.

STEP FIVE


It really doesn't NEED it (it is quite rich)... but you can top the drink off with some whipped cream and...


...a dust of cocoa and cinnamon!

FINISHED!

Now, sit down...get all cosy and sip on this delicious, chocolatey cup of joy! 

Enjoy!

Speak soon
Isabel x


Share:

Monday, 1 December 2014

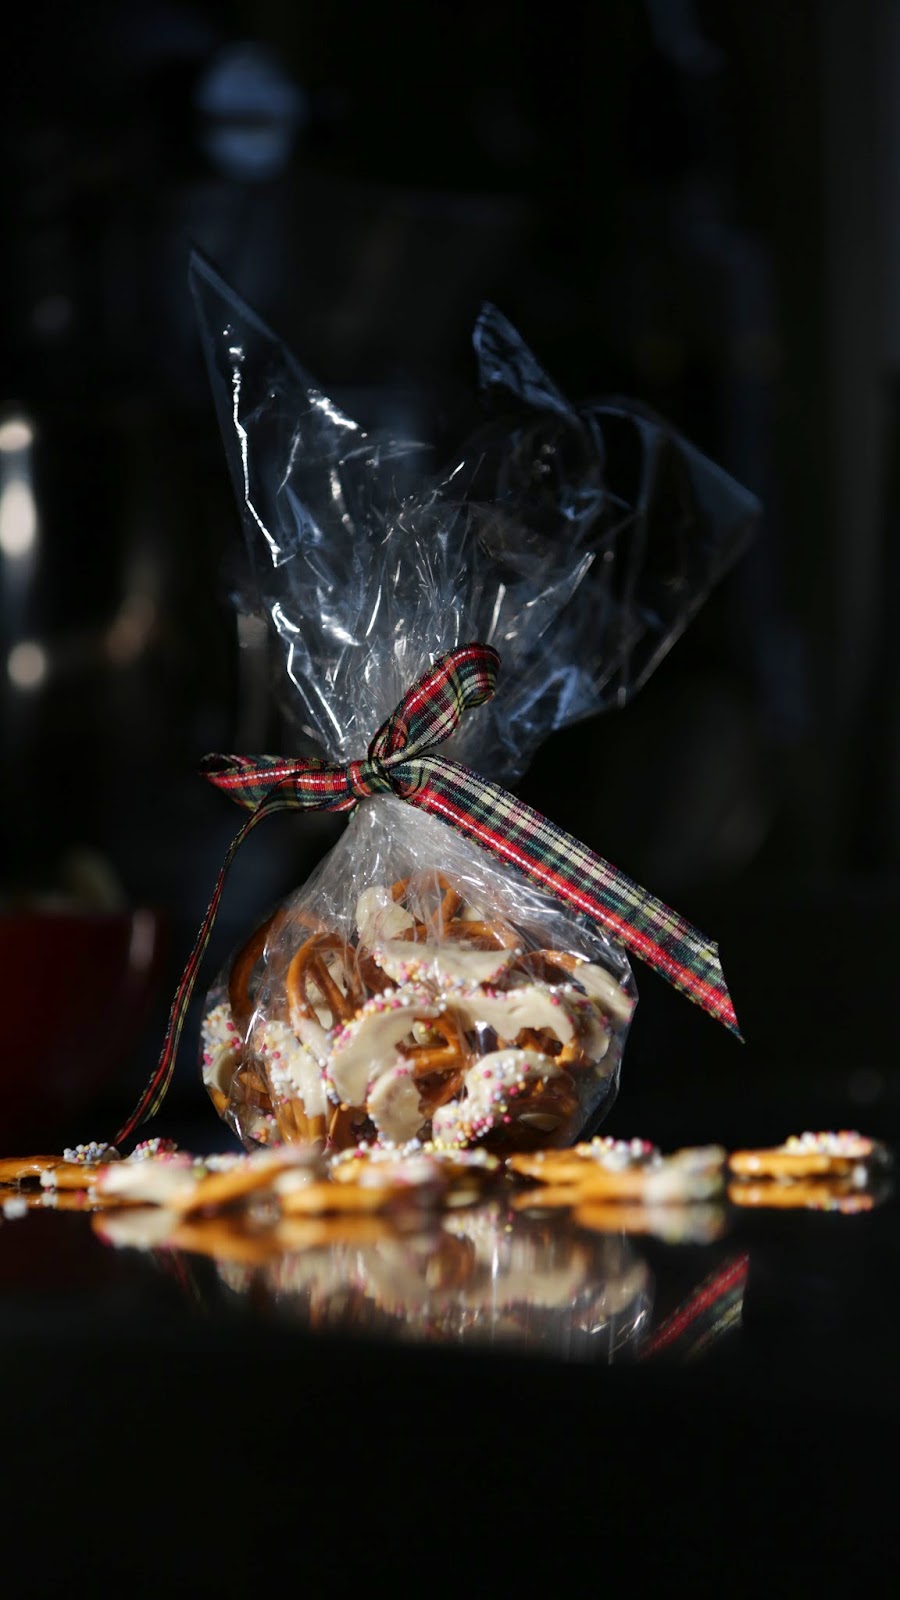
Edible Gift Ideas: 'Snow-dipped Pretzels'!

It is finally December so I'm going to jump right in with a Christmasy post! Here is an idea for a tasty treat which is quick, cheap and easy to make. This is also a good homemade gift for someone! I wanted to create a post that was accessible to all ages, trying to get the family involved and have some fun... 'tis the season to be jolly' and all that! So here you go, some 'Snow-dipped Pretzels'! 


YOU WILL NEED

Ingredients 

200g of white chocolate
A packet of pretzels 
Some pretty sprinkles (you could use edible glitter)

Equipment

Saucepan
Wooden Spoon
A bowl
A few large plates or baking trays
Baking paper


STEP ONE


Put some water into the saucepan and put a bowl on top. Heat the water until it begins to simmer and heat the bowl above. Whilst it heats up, break up the chocolate into chunks. 

STEP TWO


Melt the chocolate in the bowl, stir it now and again so the heat is evenly dispersed. Whilst it melts (it doesn't take long at all)... set up a large plate or tray next to the pan and put a piece of baking paper on it. This will make it easier for you later on as the chocolate won't stick to it.

STEP THREE


Dip the pretzels into the melted chocolate! I chose just to dip half in because it was less mess but you could dunk the whole thing in if you prefer! 


STEP FOUR


Before the chocolate dries sprinkle the... sprinkles! I would have loved to use edible glitter or sprinkles that were more seasonally coloured.. but I didn't have the funds and I already had these in the cupboard! 

STEP FIVE


Continue with this process until all of your chocolate and pretzels are gone!
Then just pop them in the fridge to set... half an hour did it for me! Then just remove them off of the plates and into a bowl to munch on or wrap in cellophane as a cute little gift! 

These are sooooo yummy! I love the contrast of salt and sweet together. They are quite addictive... just to warn you!


I hope you enjoy! :)

Speak soon
Isabel x


Share:
© isabel's insight | All rights reserved.
Blogger Template Developed by pipdig