Big This Week

Recent Posts

Saturday, 23 January 2016

‘Free-From’ Chocolate Ice Cream

Hi Everyone,


 Welcome back! I have another delicious recipe for you.
As some of you may know, I don’t really have a sweet tooth. When ice cream is on the scene it’s another story. However, since I haven’t been eating dairy I have been having a bit of an issue- funnily enough! I know there are brands out there that do sell 'dairy free' ice cream but it’s much more expensive and frankly, I can’t afford it right now. I have done some research and have created this delicious, chocolaty ice cream which is also vegan, dairy free and gluten free! 


You will need:

Food Processor or Blender
Sharp Knife
Measuring Spoons
Sealable Tub
Spatula


Ingredients: 
6 Bananas (Ripe bananas are better as they are sweeter but I personally don’t like the taste!)
½ Cup Almond Milk
1 ½ Cups Cacao Powder 
1 ½ Tbsp Agave Nectar or Honey (Do this to taste!)
1 Tsp Vanilla Extract
Pinch of Salt

Step One
Put all of the ingredients into a food processor and blend until a smooth, creamy paste is formed. If you don’t have one then use a blender, however, add the ingredients in batches as it may have some issue due to the think texture.

Step Two
Pour the mixture into a plastic tub and put it in the freezer for at least 3 hours.

You’re done! Enjoy this with lots of different toppings, for example, crushed hazelnuts, peanut butter, strawberries… the list is endless. 


I hope you enjoy!

Isabel x
Share:

Saturday, 9 January 2016

Chocolate & Peanut Butter Protein Balls

Hi Everyone,


I tend to get peckish midmorning and afternoon and I need to have a little something to satisfy my hunger until the next meal time. Something protein based is really good for slow release energy. Although I have more of 'savoury tooth' I do like a bit of chocolate now and again and I love peanut butter (Reese's Pieces are just dreamy). However, I wanted to create something that had a similar flavour but was much more nutritious, would give me energy and be cost effective in comparison to buying protein bars in the shops. So I did some research and food shopping and this is what I have created! (They have been tried and tested on my friends and family-I haven't had any negative response so far!)


You will need: 
Food Processor
Sharp Knife
Baking Sheet
Baking Parchment

Ingredients:
Organic Cruchy Peanut Butter (1 Cup)
Porridge Oats (I used gluten free) (1 Cup)
Chia Seeds (2 Tbsp)
Organic Dark Chocolate (1/2 Cup
Dates (Meduel Dates are best- I didn't have any this time and they are still yummy) (1 Cup)


Step 1:
Cut up the chocolate and dates into smaller pieces and then
blend all of the ingredients together, adding water gradually to change the consistency. It needs to be reasonably sticky so you can roll them into balls later on. Add more of the dry ingredients if its too wet and more water if it isn't binding. 


Step 2:
Line a baking tray with baking parchment and roll the mixture into bite size pieces. 


Step 3:
Put the balls in the fridge for half an hour to let them set. 


Step 4:
EAT!


I hope you enjoy these balls of yumminess! 

Speak soon
Isabel xx


Share:

Wednesday, 10 December 2014

Hazelnut and Cinnamon Hot Chocolate

CALLING ALL YOU CHOCOLATE LOVERS!

It's that time of year where you just want to snuggle up on the sofa with a blanket, film and hot chocolate... so here is something a little bit different. This is definitely a treat but is so worth the calories! Here is a recipe for a hazelnut and cinnamon hot chocolate... it has been tried and tested by a few of my friends and they LOVED it! So, if you're interested... carry on reading (its easy!)


YOU WILL NEED
Ingredients:
Chocolate and hazelnut spread 
Cinnamon
Milk
Whipped cream (optional)
Cocoa powder (optional)

Equipment:
Mug
Saucepan 
Spoon


STEP ONE


Pour the milk into your chosen mug (just for measuring purposes) and then transfer this into a saucepan. Heat the milk on a medium setting, just enough that the chocolate will melt into it later on.

STEP TWO


Once the milk has heated up a little bit, add a spoonful (or two... ) of chocolate hazelnut spread. If making a big batch I would just add a spoonful per person (this is a dessert spoon). Keep stirring the mixture so the chocolate is dispersed throughout. 


STEP THREE


Then add a pinch of cinnamon to the chocolatey yumminess!
This is just to make it a bit more Christmassy... 

STEP FOUR


Once everything is mixed together and heated, pour the hot chocolate back into your mug.

STEP FIVE


It really doesn't NEED it (it is quite rich)... but you can top the drink off with some whipped cream and...


...a dust of cocoa and cinnamon!

FINISHED!

Now, sit down...get all cosy and sip on this delicious, chocolatey cup of joy! 

Enjoy!

Speak soon
Isabel x


Share:

Monday, 1 December 2014

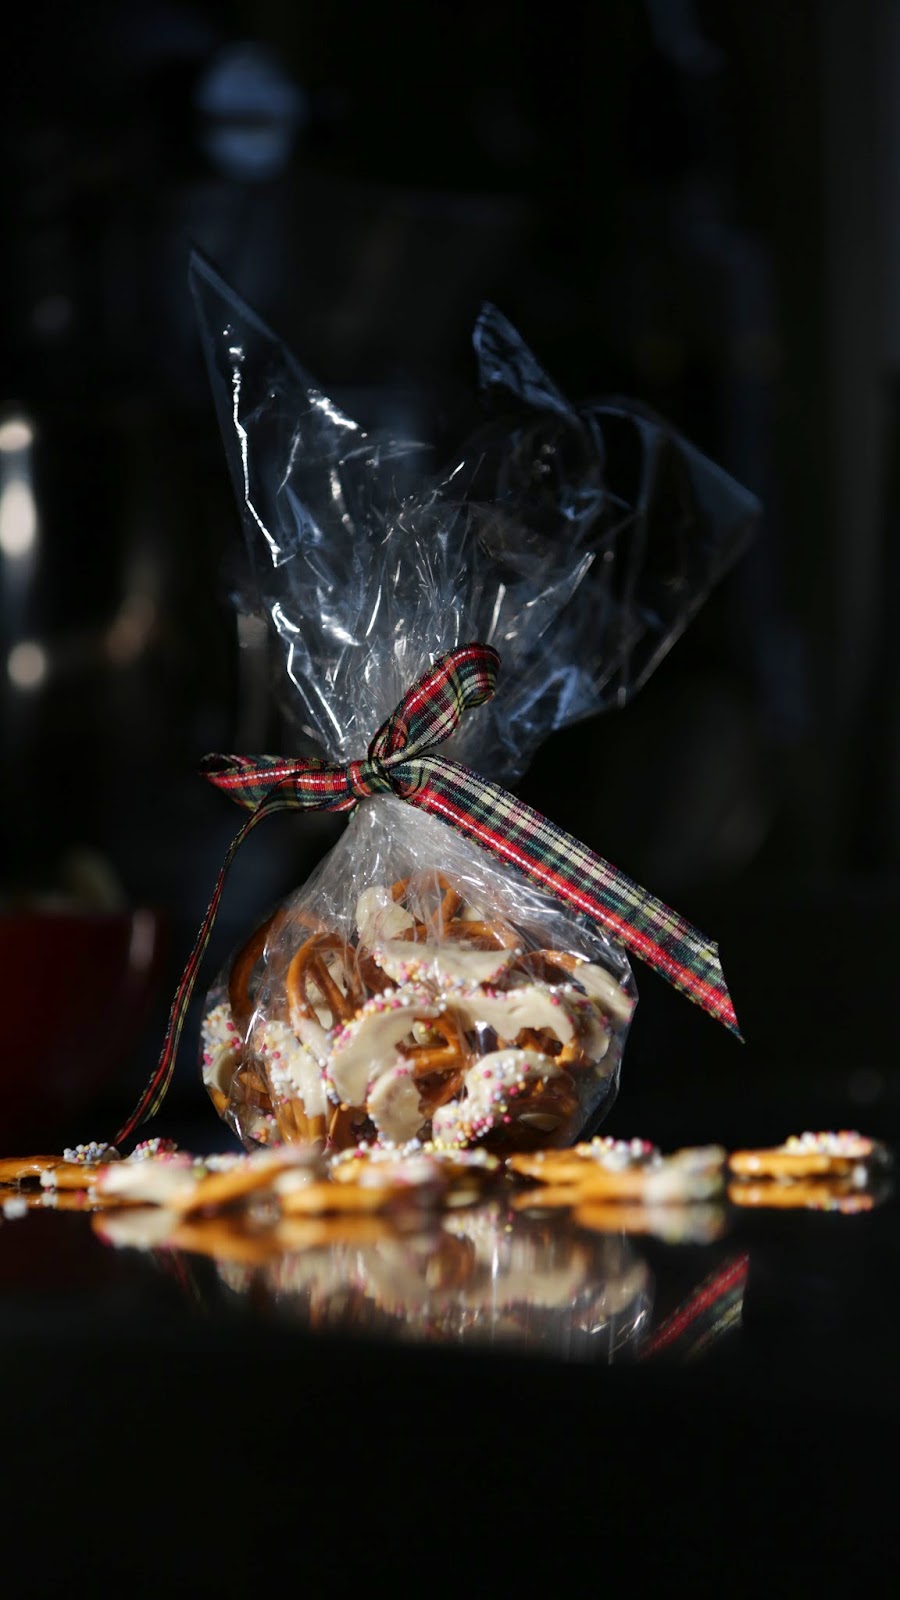
Edible Gift Ideas: 'Snow-dipped Pretzels'!

It is finally December so I'm going to jump right in with a Christmasy post! Here is an idea for a tasty treat which is quick, cheap and easy to make. This is also a good homemade gift for someone! I wanted to create a post that was accessible to all ages, trying to get the family involved and have some fun... 'tis the season to be jolly' and all that! So here you go, some 'Snow-dipped Pretzels'! 


YOU WILL NEED

Ingredients 

200g of white chocolate
A packet of pretzels 
Some pretty sprinkles (you could use edible glitter)

Equipment

Saucepan
Wooden Spoon
A bowl
A few large plates or baking trays
Baking paper


STEP ONE


Put some water into the saucepan and put a bowl on top. Heat the water until it begins to simmer and heat the bowl above. Whilst it heats up, break up the chocolate into chunks. 

STEP TWO


Melt the chocolate in the bowl, stir it now and again so the heat is evenly dispersed. Whilst it melts (it doesn't take long at all)... set up a large plate or tray next to the pan and put a piece of baking paper on it. This will make it easier for you later on as the chocolate won't stick to it.

STEP THREE


Dip the pretzels into the melted chocolate! I chose just to dip half in because it was less mess but you could dunk the whole thing in if you prefer! 


STEP FOUR


Before the chocolate dries sprinkle the... sprinkles! I would have loved to use edible glitter or sprinkles that were more seasonally coloured.. but I didn't have the funds and I already had these in the cupboard! 

STEP FIVE


Continue with this process until all of your chocolate and pretzels are gone!
Then just pop them in the fridge to set... half an hour did it for me! Then just remove them off of the plates and into a bowl to munch on or wrap in cellophane as a cute little gift! 

These are sooooo yummy! I love the contrast of salt and sweet together. They are quite addictive... just to warn you!


I hope you enjoy! :)

Speak soon
Isabel x


Share:

Sunday, 26 October 2014

Halloween Series: Chocolate Orange Halloween Cupcakes!

So, I thought I would do a spot of baking... another love of mine. Don't get me wrong, it wasn't as relaxing as I had originally intended... I had some issues! But you won't be seeing them so its all gooood! Haha


YOU WILL NEED


Ingredients for 12 cupcakes:
Dry-
210g caster sugar
105g soft brown sugar
255g plain flour
50g cocoa powder
2 tsp baking powder
1/4 tsp salt

Wet-
70g unsalted butter
2.5 medium eggs
1 tsp vanilla extract
1 tbsp orange zest
240ml whole milk

Ingredients for icing:
350g icing sugar
150g unsalted butter
2 tbsp milk

( I would advise leaving the butter and eggs out over night )

Method

STEP ONE

Preheat oven to:
Fan- 170C (375F)
Conventional- 190C
Gas Mark- 5

STEP TWO


Beat the butter and sugars together in a bowl or food mixer until combined and light in colour.

STEP THREE


Add the eggs one at a time on a medium speed. Crack the third egg into a bowl a whisk it slightly and just add half. 

STEP FOUR


Add the deliciously zingy orange zest into the mixture... 


...and the vanilla extract!

STEP FIVE


Grab a separate bowl and a sieve. Pop the flour, cocoa powder, baking powder and salt into the sieve...


...and sift them! 

STEP SIX 


Add this to the mixture gradually, alongside the milk...


...switching between the two.

STEP SEVEN


Your mixture should look a lil' summin' summin' like this...and should smell heavenly! (I know you're not supposed to have raw egg... but how can you not have a little taste eh?!)


 STEP EIGHT


Pick up your baking tin which should be lined with some Halloween themed cupcake cases... and evenly distribute the mixture in to the cases until they are 2/3 full. 

STEP NINE


Pop them in the oven for 18-20 minutes, keep an eye on them... you will know they are ready when a skewer or cocktail stick (once stuck into the cake) comes out clean. Once they are cooked, remove them from the baking tin thingy and put them on a wire rack to cool. 

STEP TEN


It's icing tiiiime! Sift the icing sugar into a bowl...


...add the softened butter and milk, then mix together.

STEP ELEVEN 


This is the 'creative' bit... I chose to pipe my icing but you could simply spread it on with a knife! 


Awh, how sweet! (literally.. whaheeeey) 

STEP TWELVE


Decorate! I just bought some sprinkles from Waitrose! Just go maaaad! 


FINISHED! 

Now... take a big ol' bite!


YUUUUUUUUM!!

I hope you enjoy!

Speak soon
Isabel x


Share:
© isabel's insight | All rights reserved.
Blogger Template Developed by pipdig